Homemade Bread Stuffed with Herbs and Cheese

Friday, July 23, 2010


I have been DYING to try this new recipe from Fine Cooking Magazine and boy am I glad I did! Crusty bread filled with bright green pesto and creamy farmer's cheese ... are you salivating yet? Well, I am!

First, a note about Farmer's Cheese. Ever heard of it? Me neither. Glad Fine Cooking is broadening my cheese palette though. After a short Google search, I found out Farmer's Cheese is a soft white cheese made all over the world. It has a very mild flavor and could be melted, sliced or crumbled to finish off your dish. I like the flavor so much I think I'll serve it with crackers at my next gathering! It reminds me of Muenster Cheese. I used to always eat Muenster instead of American on sandwiches growing up, once I popped a piece of the Farmer's Cheese in my mouth, the flavor took me back to my Mom's kitchen in Orlando, Florida where I'm pretty sure the 1980's apron was born. (Okay, Okay, I'll post a pic soon!)

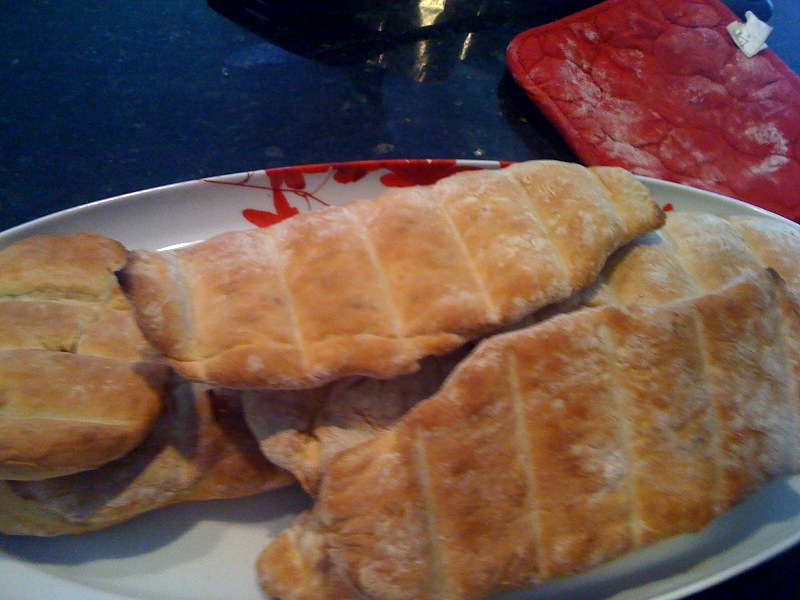
Onto the bread! I basically followed the recipe in Fine Cooking, although I was lazy and used pesto from a jar instead of the herb mixture from scratch they suggested. I'll post the recipe in case you want to try it.

We served this for some friends over dinner last week and the bread was a hit! Seriously, if you're already going to the trouble of making bread, why not stuff it with some yummy surprises!?

Grilled Naan Filled with Herbs and Cheese
Makes 10 Naans - it could make more, I felt like I could get 12 out of the batch

For the Dough
1 lb or 7.5 oz unbleached all purpose flour
4 TSP. baking powder
4 TSP. Kosher Salt
2 TSP Granulated Sugar
1/2 Cup plain whole-milk yogurt
1 large egg
1/4 Cup peanut or Canola oil, more for brushing (I used Olive Oil)

For the Filling
1 1/2 Cups roughly chopped fresh cilantro
1/2 Cup roughly chopped fresh mint
1/4 Cup unsalted cashews
2 Cloves garlic, chopped
1 TBS Chopped fresh ginger
1 tsp Kosher salt
6 TBS Peanut or Canola Oil, I used Olive Oil
2/3 Cup farmer cheese or queso fresco
Kosher Salt for sprinkling

Make the Dough
Combine the flour, baking powder, salt and sugar in the bowl of a stand mixer fitted with a dough hook. Whisk the yogurt and egg in a medium bowl, then whisk in 1 1/2 Cups of lukewarm water and add the oil. Pour the egg mixture into the flour mixture and mix on low speed until a soft, sticky dough starts to clump around the hook, about 5 minutes. If the dough seems too wet, add more flour, 1 tsp at a time. Line a baking sheet with parchment and dust lightly with flour. Turn the dough out onto a lightly floured surface and divide it into a ball and arrange them on the baking sheet. Lightly brush the dough with oil, cover with plastic and let rest at least 1 hour and up to 2 hours before shaping.

Make the Filling
Combine the cilantro, mint nuts, garlic, ginger and salt in a food processor. Pulse until the ingredients are finely chopped. Scrape the sides of the bowl, turn the processor back on and pour the oil through the feed tube, mixing until incorporated. Transfer to a medium bowl.

Make and Grill the Bread
On a lightly floured surface, roll a dough ball into a 5 inch circle. spread about 2 tsp. of the grilling around the center, leaving a 1/2 inch border. Scatter 1 TBS of the crumbled cheese over the filling. Gather the border to form a pouch, pinching it to seal in the filling. Turn the pouch pinched side down and using very light pressure, roll into a 6 inch circle. Transfer to a parchment lined baking sheet. Continue filling and shaping the dough, layering parchment between the breads if you stack them.

GRILL
Brush the grill grates with a stiff brush, then wipe with lightly oiled paper towel. Grill the breads in batches pinched side down, covered, until they look puffy and the undersides brown slightly in places 2 - 3 minutes. Turn over and cook the other side, covered until grill marks form and the breads are cooked through about 2-4 minutes. Just before taking them off the grill, turn the breads pinched side down and brush lightly with butter. Sprinkle with a pinch of salt. Cut each bread in half and serve warm.

I can't BELIEVE I didn't take a picture with the bread cut in half so you could see the melted cheese and herbs. Sorry! Next time! It was delish!

Enjoy and Mangia! Mangia!

Double Spaghetti Dinner

Tuesday, July 13, 2010


There are a few things I try to ALWAYS have in my kitchen. They aren't the normal "staples" others may consider useful in their kitchens, but "Courtney's Staples" are definitely a must in mine. If you try this recipe, I bet you'll start keeping this list of goodies nearby.

1. Olive Oil - I very rarely ever use any other kind of oil, and you know what? I strongly disagree with all this talk about Canola oil being the new healthy oil. I'm checking my credentials at the door when I say this because, well, I don't have any. But Virgin oil from fresh olives to me, is the most natural oil you're going to get. Where does Canola come from anyway?! And don't get me started on Vegetable Oil. But, yes, you will find it in my pantry. 'Tis true. I try not to use it, but you gotta have it sometimes.

2. Minced Garlic - Eh, sometimes I'm lazy, who isn't? It's the perfect flavor in a hurry. Try not to buy the kind packed in oil. And the roasted minced garlic in a jar is great on bread under the broiler for a few minutes.

3. Fresh Garlic - My Italian Grandfather used to cut the top of a garlic bulb, pour a little Olive Oil and bake. Once all the little cloves are soft, he'd squeeze the garlic-mush onto bread. Best garlic bread I've ever had. Swear. If you always have fresh garlic on hand, you'll always find a way to use it in food. Plus, despite the odor, it's good for you!

4. Pine Nuts - Love a little crunchy-nutty-protein surprise in my veggies - try them on asparagus or green beans too! Sauté them in a little oil and set aside, then sprinkle on top of your dish. Too easy!

5. Grated Parmesan Cheese - Not the kind in a bag, the kind in a little container. Or better yet, grate it yourself. Either way, it's so versatile and a must when making a quick pasta dish.

6. A Whole Wheat Grain (Pasta, Quinoa, Rice, etc.) The pasta/grain never has to take center stage of your meal, it should be a side dish.

7. Dried Minced Onion - Obviously if you've read this far, you know I like strong flavors (and bad breath, right?!) But, minced onion is another quick and lazy way to get a little more flavor or spice into your food. I just sprinkle it in when I think I need it ... and sometimes I just have a-what-the-heck-moment and sprinkle it when I probably don't need to, still tastes good to me!

**8. And, starting this summer, FRESH Basil and Parsley from a small pot I use on my back deck. What did I do before my bount-ilicious pot full of fresh herbs? I've been using fresh basil on summer tomato sandwiches, in salads and tonight, in the pasta. I'm going to try to keep an indoor herb pot this winter, but I'm still trying to figure out how to make it look okay in my kitchen. Will need input from friends. =)


This recipe is another great one from Teresa Giudice. It came out of her book Skinny Italian. I'm excited to share this recipe with you for two reasons: Zucchini is in season and it's healthy!

Sauteed Zucchini "Spaghetti" with Pine Nuts

Makes 4 servings

2 TBSP Pine Nuts
3 Large Zucchini, scrubbed and ends trimmed
1 TBSP Extra Virgin Olive Oil
1 Garlic clove, minced
1/4 TSP Salt
1/4 TSP Ground black pepper

1. Heat a large skillet over medium heat. add the pine nuts and cook, stirring often, until toasted, about 2 minutes. Transfer to a plate and set aside.
2. Using a mandoline, plastic V slicer, or spiral slicer, cut the zucchini into long thin julienne strips. Do not use the seedy center of the zucchini, as it can be too soft and will ruin the look and texture of the strips.
3. Heat the oil and garlic together in the skillet over medium heat, stirring occasionally, until the garlic is tender, about 1 1/2 minutes. Increase the heat to high. add the zucchini and cook, stirring occasionally, just until it is heated through and still al dente, about 1 minute. Don't overcook the zucchini, or it will get mushy. Remove from heat and stir in pine nuts, salt and pepper. Serve hot.


Courtney's Quick Pasta

The ingredients below are a healthier way to eat what I like to call "Child Pasta." Do you remember going to your Grandparents house and having spaghetti, butter and Parmesan cheese? Okay, well the not-so-Italian Grandparents from the other side of our family made it for us and we LOVED it. Actually, I'm pretty sure if I made it for Picky Pants he'd love it too. But, I refuse and it's just as well because he loves his pasta the healthy way. To me, if you start cooking like this at the very beginning, your picky eaters will never know there's a much heart-attacky-greasier way to eat Quick Pasta!

Whole Wheat Pasta
Salt
Olive Oil
Minced Garlic
Pepper
Basil
Parmesan Cheese

1. Salt a pot of water before boiling. Boil pasta until al dente. Drain but do not rinse. Using the same pot, drizzle oil and rest of ingredients and stir. Taste. Adjust for flavor. You can also add chicken or shrimp to this dish for protein.


Mangia! Mangia and lots of XXOO!!

The Hamburgler took over my Birthday Cake!

Thursday, July 8, 2010

Let's pretend I had never baked a cake in my life. Let's pretend I never cook. If today had been my first experience in the kitchen, I may have yanked off my Mom's 1985- red-and-white-gingham-and-lace-sweetheart-front-apron and hung it up by it's cute, pearly buttons in the corner of my kitchen. It would have hung in the kitchen on a hook in all its' tacky gloriousness, mocking me for what happened today. For those of you who have never seen my apron, it's awesome. It really is my Mom's and I'm pretty sure she got it in 1985. It should have a name, any suggestions?

I'm going to the lake for my birthday, a place where big, beautiful cakes do not belong. I didn't want to spend too much time on my cake for fear of it falling in the water, or melting. (Those of you who know I've dropped my Iphone in water twice know where I'm coming from.) But, I do want to feel like a kid again and have a real-live birthday cake I made with love for all my friends and husband to enjoy. Well, I guess I have that, thanks to The Cake Doctor. But, it's not too pretty!


When it comes to cakes and frosting... I rarely start with a box, but there's certainly nothing wrong with it. My Mom gave me "The Cake Doctor Returns" for Christmas this year. It's a cookbook filled with desserts: pound cakes, bundt cakes, layer cakes, cupcakes, bars, brownies, and cookies. The author, Anne Byrn, is known for starting her recipes with a box mix but "doctoring" it up, to make it taste homemade and not generic. This is my first experience with Byrn's bright ideas and this recipe was definitely harder than it looked. However, I remember my Mom baking some knock-out cakes from Byrn's previous book a few times growing up... maybe I'll give it another shot. Well, sifting through the beautiful pictures, I earmarked about 7 ideas for my birthday cake. I tossed the ideas back and forth with my Mom and some friends. I settled upon "Smith Island Cake" for it's Reese's peanut butter cup topping and beautiful layers of vanilla cake with fudgy chocolate icing.

Smith Island Cake, according to The Cake Doctor, comes from Maryland's Smith Island. It's famous for thin layers of yellow cake. You achieve these thin layers by baking 4 rounds, then splitting them in half horizontally. She even states in the book: "Splitting layers has nothing to do with splitting hairs" ... I beg to differ Cake Doctor!! My cake looks like the Hamburgler threw up all over it! I'm sure it tastes fabulous, it should for the amount of time I spent on those layers.


For the Cake
8 Reese's peanut butter cups
Spray for misting the pans
Flour for dusting the pans
1 package IGA plain yellow cake mix
1 1/2 C evaporated milk or whole milk
8 TBSP (1 stick) butter
1 TSP Vanilla Extract
4 Large Eggs

For the Frosting
12 TBSP (1 1/2 sticks) butter
1/2 C Unsweetened Cocoa Powder
1/2 C unsweetened cocoa powder
1/2 C Plus 3 TBSP evaporated milk
1 TSP Vanilla
6 C Confectioners' sugar, SIFTED

1. Place the peanut butter cups in freezer.
2. Make the cake: Place a rack in the center of the oven and preheat to 350. Lightly mist four 9-inch round cake pans with spray, then dust them with flour. Shake our the excess flour and set pans aside.
3. Place cake mix, 1 1/2 C milk, 8 TBSP butter, 1 TSP vanilla, and the eggs in a large mixing bowl and beat with an electric mixer until well mixed, 30 seconds. Stop the machine and scrape down the side of the bowl with rubber spatula. Increase the mixer speed to medium and beat until the batter is smooth, 1 1/2 minutes longer, scraping down the side of the bowl again if needed. Divide the cake batter evenly among the 4 prepared cake pans, about 1 3/4 cups of batter per pan, smoothing the tops with a rubber spatula. Put the pans in the oven, placing 2 pans on the center rack and 2 on the rack above.
4. Bake the cake layers until they are golden brown and the tops spring back when lightly pressed with a finger, 10 - 12 minutes (The baking time is short here because the batter has been divided among 4 baking pans). Rotate the pans after the layers have baked for 5 minutes. Transfer the cake pans to wire racks and let the cake layers cool for 5 minutes. Run a dinner knife around the edge of each cake layer and give the pans a good shake to loosen the cakes. Invert each layer onto a wire rack, then invert it again onto another rack so that the cakes are right side up. Let the layers cool completely. 10 - 15 minutes.


5. meanwhile, remove the peanut butter cups from the freezer. Place 3 peanut butter cups in a good processor, pulse the machine to make small chunks, and set these aside for garnish. Pulse the remaining 5 peanut butter cups to a fine powder and set aside.
6. make frosting: Melt the 12 TBSP butter in large saucepan over low heat, 2 - 3 minutes. Stir in the cocoa powder and 1/2 C plus 3 TBSP milk. Cook 1 minute longer, stirring until the mixture thickens and just begins to come to a boil. Remove the pan from the heat. Stir in the 1 TSP Vanilla and confectioner's sugar continuing to stir until frosting is thickened and consistency of hot fudge sauce. To keep the icing from hardening, place the saucepan over low heat while frosting the layers.
7. To assemble the cake, using a long, serrated knife, carefully slice each cake layer in half horizontally to make 8 layers. Place the bottom half of one layer, cut side up, on a cake plate and spoon about 1/4 Cup of the frosting on top, spreading it evenly to the edge.


Sprinkle about 1 TBSP of the powdered peanut butter cups over the frosting. Place the top half of this layer, right side up, over the frosting. add another 1/4 C of the frosting and spread it to the edge. Then sprinkle another TBSP of powdered peanut butter cups over it. Repeat with the remaining layers, then frost the top of the cake and sprinkle the reserved chunks of peanut butter cups over it.


I hope I don't sound too harsh! It's probably a delicious cake! The layers were harder to cut in half than she led on in her book and I even cheated in the middle by NOT cutting one of the layers in half. So, I think my layer birthday cake is 6 layers instead of 8. I think we will enjoy it and I will definitely re-post my thoughts when I get back from the lake. Enjoy your day! And as always, Mangia! Mangia! xxoo


I've been lost, but now I'm found!

Wednesday, July 7, 2010

Hello friends! I've missed you! Just a heads up, my computer has been out of commission and I've been operating solely off my phone (thank Goodness for IT!) My computer is back and so am I! I'm making my birthday cake tomorrow and PROMISE to upload pictures and a nice, long blog. (I know you've been so patiently waiting for it)

Love love and Mangia! Mangia!
courtney

My IGA! Copyright © 2009 Designed by Ipietoon Blogger Template for Bie Blogger Template Vector by DaPino