
Hi faithful readers, I have great news! This blog has moved on to a bigger and better site. Check out the new digs: http://www.igameals.com
Instead of using Google to subscribe, I'm now using a larger website to host my blog that allows anyone to subscribe simply by typing their email into the "Subscribe" box on the right. You should automatically get an email confirmation and anytime I update this blog ... you'll get an email to your inbox.
Thank you for subscribing here and wish me luck at my next virtual blog home ;)
Mangia! Mangia!
Courtney
Chocolate Chip Cookies, made with love!
Thursday, September 16, 2010

These cookies were definitely made with love. I always say that. This apple cobbler? Made with love. Oh, even Buffalo Chicken Dip can be made with love. To me, when you make something with love, you put your heart, soul, mind and body into it. I imagine my thoughts as powdered sugar, sifted into something sweet like icing. Or my frustrations kneaded and pounded into fluffy dough for bread. Oh, and of course, some laughter sprinkled on top of fresh baked muffins for some extra love.
See, for some people jogging a few miles or singing in the shower is their "think" time. For others it's constant prayer. While I love a good prayer session with My Man ... ahem, God... when I need "me" time I turn to my pots, pans and my trusty 80's apron. I set my phone aside, turn up the music in the next room and submerge myself in measurements, chopping, sifting, stirring, slicing and of course tasting. I talk to myself too! Oh to be a fly on the wall at my house! Ha! I'm telling you, I always feel better once I taste the batter of a new cake or see golden brown cookies raise perfectly after spending just the right amount of time under the hot lamps of my oven. No matter how I'm feeling that day, I know being in the kitchen will produce a feeling of accomplishment and satisfaction. Perhaps it's all that I've stated above but I'd also like to think My Man and I get to spend some quality time together in the kitchen. Sometimes, before I know it, in the sounds of a beating mixer or tick of my kitchen timer, whatever answer I was initially seeking in my heart is revealed. I believe it's because My Man knows I'm not the best listener so he speaks to me in my element. Which is of course, my kitchen. ;) Now do you get it? Do you get why I say my food is made with love?
Some of you may think my nickname for God is irreverent. Nothing could be further from the truth! I call God and Jesus "My Men or My Man" because when I visited my brother in Russia a few years ago we met a Russian girl who tried to explain to us how to go into a Russian Orthodox Cathedral with a candle and pray. She knew we were Christian, so we wouldn't necessarily be praying to all the Saints in the Cathedral. But, we wanted to experience something spiritual. So, she grabbed two candles, pointed at Jesus and said "Go pray to your Man." It was the funniest and cutest way of referencing Jesus I've ever heard. My brother and I will forever talk about praying to our Man, and of course, we do it in our best Russian accents. Join us in the laughter and prayer to Our Man, it's a cherished memory I'm sharing with you. With love. ;)
This is my brother and I before praying to our Man.

And this, is a terrible picture of a picture, but nevertheless, our Man.

Oh, I'm SUCH a sap! Okay, I'll move on to the chocolate chip cookie recipe I am sharing with you. Picky Pants loves chocolate chip cookies, perhaps more than he loves me. (How dare he?!) So, since it's our anniversary week, I thought I'd surprise him with his favorite thing in the whole world: warm from the oven, ooey, gooey, chocolate chip cookies. Now, you all know by now if I'm going to make something and blog about it, it's probably a new recipe. This blog post is no different. I have made my Mom's Chocolate Chip Cookie recipe for years, but my friend and fellow blogger enticed me with her recipe. Have you heard of anyone putting their cookie dough in the refrigerator for 24 hours or so before baking them? I have and I remember reading a lot about it a few months ago. I'm not sure why I haven't tried it until now, but it seems the secret to this recipe is simply refrigerating the cookie dough for a bit before baking. If you're like me, it's actually not so simple because I'm a sucker for cookie dough. I can't keep it in my freezer because I'll find an excuse to break off a piece and eat it for dinner ... or lunch ... or breakfast. Do you see why I work out so much now? ;)
Here's the recipe from Erin's blog
1/2 Cup Sugar
1/2 Cup Firmly packed light brown sugar
1 Stick unsalted butter
1 Large egg
1 TSP Vanilla
1/2 TSP Baking Soda
1 1/4 Cup All-Purpose Flour
1/4 TSP Salt or 1/2 TSP Flaky Sea Salt
1 1/s C Choc. Chips
1. Beat Sugars and butter together until smooth. Mix in egg, vanilla and baking soda.
2. Stir together flour and salt then mix into batter. Mix in Chocolate chips.
3. Press the dough into the bottom of the bowl, press plastic wrap to dough and make sure to get all the air out. Sit in refrigerator for 36 - 48 hours.
4. Scoop cookie dough to 2 tbsp balls
5. Bake 18 minutes, 300 degrees

The cookies turned out fantastic, especially because they were made with love ;)
Sit and enjoy your family today and Mangia! Mangia!
Courtney
Hola de Espana!
Wednesday, September 8, 2010
Hola! I'm back from Spain safely and with much to tell! I will start by bragging on my girl RW and myself. We chose to order EVERYTHING from the Spanish menu even though each waiter brought us the English version. I'm not sure how, but everyone knew we weren't from anywhere but the good 'ol US of A. Is that a compliment?! Not sure ... Anyway, we were glad to pick and choose the words out of the menu we knew and most the time happily surprised at what came to the table, especially after a glass of wine or two. =) It forced us to learn a lot of the language and I think the Spanish people appreciated us trying to learn too. (As badly as we may have sounded trying to speak it). Actually, I have a confession to make: RW knows way more Espanol than I do and if I were there by myself I'm pretty sure I would have gotten on the train to Siberia accidentally or missed the train all together. Yes, we all know what a scatter brain I can be.
My thing is food, we all know this. So, we went to the San Miguel Food market in Madrid which was great! If you can imagine an upscale food flea market, that's exactly what it looked like. Huge glass windows surround the entire building giving passersby a glimpse of the succulent food inside. It would lure me in anyway. We took a few pictures but the prettiest ones were the fruita. I haven't met a fruit I don't like and in Spain it was no different! Have you heard of an Higo? Pronounced I-go ... silent "H." I'm not sure if I'll do it justice by explaining: the Higo is small. You peel the skin down like a banana even though it's circular in shape. The inside has a few seeds but they're tiny and barely noticeable. These babies are juicy and taste like a mixture of many tropical fruits. See, I told you I wouldn't do it justice.

Moving on to Pardon Pimientos. I believe it's translated "green pepper" but I also think the word "spicy" gets lost in translation. When we were in Barcelona we went to an awesome Tapas place. I saw a man across the restaurant eating a plate of broiled peppers sprinkled with salt. I had to get my hands on them, I love spicy food, plus I'm a sucker for anything as pretty as these shiny, small tamales! (They're not really tamales) I ate half the plate, they were delicious!

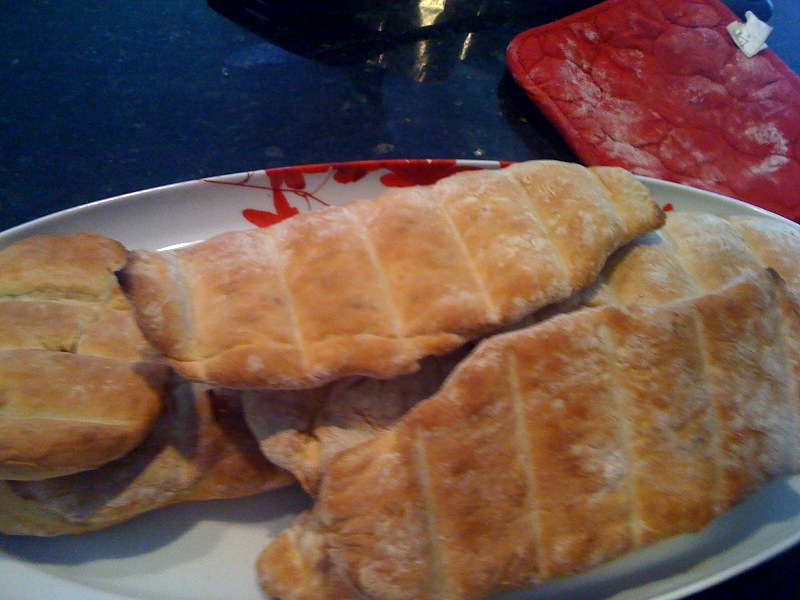
I had just arrived in Madrid and of course barely slept on the plane. RW and I walked around and explored our new surroundings for a while and stopped at a little cafe where it seemed we were too early for lunch. Remember when I told you we screamed "Americans?" Well, I'm pretty sure it was noon on the dot and Spaniards don't eat lunch until 1:30pm or later. Need I mention the slow service we received or how I pretended to eat the bush behind my chair? A 10 hour plane ride can make a sister hungry, ok!? All kidding aside, we were pleasantly surprised when we ordered from the menu. This is the sandwich I ordered from the menu that read : Bocadillo Especial. I had no idea what was on it and frankly at that point didn't care. When it came out looking like this:

I was happy. By the way, in Spain they either serve everything with fries or eggs. It's their 'thang' I suppose. We both gave this sandwich two thumbs up!

Back to reality. It's almost fall here in Bowling Green, has anyone noticed? Fall is my favorite time of year and most always I'm urging the calendar to hit September first so I can break out my pumpkin throw pillow and fall decor, but, not this year. I'm actually very sad about summer coming to a close. =( Sorry to be a downer, but I tried to ring in the fall-like weather with a fall-like dish I found from Better Recipes. The flavors in this dish are so ... opposite. The spicy sausage mixed with the sweet maple syrup really gave the meat a kick of it's own kind. Don't skimp on the rubbed Sage, it's big flavor really enhances the meat and onion mixture. Acorn squash is sweet and versatile, you can make it taste like anything you want. (Squash Pizza Dough, anyone?)
Sausage Stuffed Acorn Squash
2 Medium Acorn Squash, halved and seeds removed
1 LB pork sausage (I used HOT)
1 Small onion, chopped
1 TBSP Rubbed Sage
1/4 C Maple Syrup (I believe you could use less!)
1. Place the squash, cut side down in a shallow baking dish or pan. Add 1/2 C water and bake at 350 degrees 30-40 minutes or until tender. Meanwhile brown the sausage (stirring frequently to loosen) and add chopped onion and sage. Cook until tender.
2. When squash is finished remove from oven. Add maple syrup to sausage mix and spoon into the squash halves. Serves 4.


Have a great week, Don't forget to ENJOY and Mangia! Mangia! xxoo
My thing is food, we all know this. So, we went to the San Miguel Food market in Madrid which was great! If you can imagine an upscale food flea market, that's exactly what it looked like. Huge glass windows surround the entire building giving passersby a glimpse of the succulent food inside. It would lure me in anyway. We took a few pictures but the prettiest ones were the fruita. I haven't met a fruit I don't like and in Spain it was no different! Have you heard of an Higo? Pronounced I-go ... silent "H." I'm not sure if I'll do it justice by explaining: the Higo is small. You peel the skin down like a banana even though it's circular in shape. The inside has a few seeds but they're tiny and barely noticeable. These babies are juicy and taste like a mixture of many tropical fruits. See, I told you I wouldn't do it justice.

Moving on to Pardon Pimientos. I believe it's translated "green pepper" but I also think the word "spicy" gets lost in translation. When we were in Barcelona we went to an awesome Tapas place. I saw a man across the restaurant eating a plate of broiled peppers sprinkled with salt. I had to get my hands on them, I love spicy food, plus I'm a sucker for anything as pretty as these shiny, small tamales! (They're not really tamales) I ate half the plate, they were delicious!

I had just arrived in Madrid and of course barely slept on the plane. RW and I walked around and explored our new surroundings for a while and stopped at a little cafe where it seemed we were too early for lunch. Remember when I told you we screamed "Americans?" Well, I'm pretty sure it was noon on the dot and Spaniards don't eat lunch until 1:30pm or later. Need I mention the slow service we received or how I pretended to eat the bush behind my chair? A 10 hour plane ride can make a sister hungry, ok!? All kidding aside, we were pleasantly surprised when we ordered from the menu. This is the sandwich I ordered from the menu that read : Bocadillo Especial. I had no idea what was on it and frankly at that point didn't care. When it came out looking like this:

I was happy. By the way, in Spain they either serve everything with fries or eggs. It's their 'thang' I suppose. We both gave this sandwich two thumbs up!

Back to reality. It's almost fall here in Bowling Green, has anyone noticed? Fall is my favorite time of year and most always I'm urging the calendar to hit September first so I can break out my pumpkin throw pillow and fall decor, but, not this year. I'm actually very sad about summer coming to a close. =( Sorry to be a downer, but I tried to ring in the fall-like weather with a fall-like dish I found from Better Recipes. The flavors in this dish are so ... opposite. The spicy sausage mixed with the sweet maple syrup really gave the meat a kick of it's own kind. Don't skimp on the rubbed Sage, it's big flavor really enhances the meat and onion mixture. Acorn squash is sweet and versatile, you can make it taste like anything you want. (Squash Pizza Dough, anyone?)
Sausage Stuffed Acorn Squash
2 Medium Acorn Squash, halved and seeds removed
1 LB pork sausage (I used HOT)
1 Small onion, chopped
1 TBSP Rubbed Sage
1/4 C Maple Syrup (I believe you could use less!)
1. Place the squash, cut side down in a shallow baking dish or pan. Add 1/2 C water and bake at 350 degrees 30-40 minutes or until tender. Meanwhile brown the sausage (stirring frequently to loosen) and add chopped onion and sage. Cook until tender.
2. When squash is finished remove from oven. Add maple syrup to sausage mix and spoon into the squash halves. Serves 4.


Have a great week, Don't forget to ENJOY and Mangia! Mangia! xxoo
Double Apple Bundle
Sunday, August 22, 2010
Have I mentioned yet I'm the self-proclaimed President of my Book Club? Oh how I love to curl up with a good book, I could read for hours and Shhh! Don't tell anyone, but I actually do! When I'm bored I cook or read, then I have to hit the gym because I've cooked everything I've read and eaten everything I've cooked! (LOL!)
My Book Club meets once a month and when it's your turn to host you also get to pick the book. Last month I chose "Redeeming Love" By Francene Rivers. Don't worry, I will not give you a short synopsis of the book because obviously this is a food blog but I will tell you it's a great book with many wonderful messages. Check it out.


I made a few things for book club but the only one I'll blog about is the Double Apple Bundle. It's a cinch to make and it's very pretty. It will be great for the fall and even better for apple-pie lovers. When I say this, I'm saying it with a smile on my face: do you know what a pain it is to make an apple pie from scratch? Talk about making something with LOVE! That's why I cheat and make this Double Apple Bundle because it tastes like an apple pie,it's adorable and super easy. However, I can't wait to spend a little time in the kitchen this fall and make an ooey-gooey-cinnamony-doughy-apply-pie-Y. When I do, I promise pics and a post. For now, here's an easy dessert anyone will enjoy. It's delish!
Double Apple Bundle
2 IGA Piecrusts
3 Cups Golden Delicious Apples, sliced (Granny Smith are good too!)
Cinnamon and or Pumpkin Pie Spice to taste
Sauce
1 Cup Brown Sugar
1 Cup White Sugar
1 Stick Butter
2 Cups Water
1. Peel and chop apples. 3 cups is about 3 apples, depending on how large. You can always eyeball it and eat the leftover chunks.
2. Grease a large baking pan, 8 X 8 works great. Unroll the pie crusts. Spread them out and divide apples among the pie crusts.
3. Sprinkle with spice.
4. Jelly-roll the crusts and seal the ends. Flip the pie crusts over so the smooth surface is facing up. Take a knife and slice the bundles a few times on top so they can breathe when baked.
5. Combine everything in for the sauce in a sauce pan, bring to a slight boil then pour over apple bundles.
6. Bake at 350 for 1 hour.

Serve with ice cream or by itself. Mangia! Mangia!
PS This is also good right out of the fridge for breakfast!
Trimmings
Tuesday, August 3, 2010
I want to get this blog post up before my favorite time of the year starts. Ahhh,Fall. Pretty soon pumpkins, gourds and bright colored leaves will adorn each tabletop. I can't wait. I hope you can use these helpful tips as you begin to plan Fall, Christmas and Thanksgiving parties and dinners.
Name cards on a dining table can actually be casual and creative. I never even thought about using them until this week. We had company and I wanted to create a festive atmosphere that matched the food I made. The idea came from a wonderful website and magazine in which I shall soon be subscribing. Style at Home. Heard of it? It's great! I only want to link you to truly inspiring websites with the hopes that I've given you enough good tips (and good laughs) that you'll come back to my blog for more. Without further ado, let's discuss name card/place card holders.
For dinner with guests who may not know each other or for a fun conversation starter, get creative with placement ideas. I used letter brads for scrapbooking and poked holes into limes to make names. Here's mine: How cute is that? Sorry for the poor quality picture, but you know I take these with my Iphone. Maybe some day I'll get a good camera.
You could use pears, apples, pumpkins, squash ... the list is endless depending on what you're serving.
Since it's still summer, my cherries took center stage in my food. So, I used limes and cherries to decorate too. Take a look at the vase filler I got at Target for 4.99. Fake Cherries and apples give the clear glass globe a red hue and an old lime candle I had stuck in my cabinet was the perfect pairing to create a lime/cherry theme. Take a look at place mats and chargers ... they're also inexpensive at 1.99 a piece!

Now, I'm not saying these are the cutest ideas in the world, but it sure helped me in a pinch. I searched all over for cute place card holders and was glad to have found these ideas. If you're a wine drinker, wouldn't it be fun to slit open a cork and stick a piece of paper in between with a name on it? Genius. Not my idea, just sharing the love.
XXOO Mangia! Mangia!
Name cards on a dining table can actually be casual and creative. I never even thought about using them until this week. We had company and I wanted to create a festive atmosphere that matched the food I made. The idea came from a wonderful website and magazine in which I shall soon be subscribing. Style at Home. Heard of it? It's great! I only want to link you to truly inspiring websites with the hopes that I've given you enough good tips (and good laughs) that you'll come back to my blog for more. Without further ado, let's discuss name card/place card holders.
For dinner with guests who may not know each other or for a fun conversation starter, get creative with placement ideas. I used letter brads for scrapbooking and poked holes into limes to make names. Here's mine:
 How cute is that? Sorry for the poor quality picture, but you know I take these with my Iphone. Maybe some day I'll get a good camera.
 You could use pears, apples, pumpkins, squash ... the list is endless depending on what you're serving.
Since it's still summer, my cherries took center stage in my food. So, I used limes and cherries to decorate too. Take a look at the vase filler I got at Target for 4.99. Fake Cherries and apples give the clear glass globe a red hue and an old lime candle I had stuck in my cabinet was the perfect pairing to create a lime/cherry theme. Take a look at place mats and chargers ... they're also inexpensive at 1.99 a piece!

Now, I'm not saying these are the cutest ideas in the world, but it sure helped me in a pinch. I searched all over for cute place card holders and was glad to have found these ideas. If you're a wine drinker, wouldn't it be fun to slit open a cork and stick a piece of paper in between with a name on it? Genius. Not my idea, just sharing the love.
XXOO Mangia! Mangia!
Cherry Stuffed Pork Tenderloin and then some
Cherry and Onion Stuffed Pork Tenderloin
Disclaimer: This meal did NOT come without a few phone calls to Mom and Dad for emergency help. And, I still have all 10 fingers, but only by the wrinkle on my thuckle. Note: According to Urban Dictionary your thuckle is your thumb knuckle. But I can sincerely say it was a success and the best news about it, I'll share my mistakes and what I learned so your meal can be even better than mine! I'll walk you through it.
Picky Pants and I had 2 other couples over for dinner and while I'm normally a buffet-type-hostess, this was not THAT kind of dinner. It wasn't fancy-schmancy by any means but, yes, I did do place cards!! Have you read that post yet? Boy were they CUTE!! Okay! Food now, puh-leeze!
The Menu:
Cherry and Onion Stuffed Pork Tenderloin
Summer Salad (with cherries, of course)
Asparagus with Toasted Pine Nuts
Homemade Flat Bread
Pasta Salad
Dessert
The Occasion:
Picky Pants and I are switching churches.
In any small Bible-Belt-Sort-Of-A-Town, your Pastor and his Wife come to dinner if you invite them. Well, this 'ol girl from the suburbs of 'the ATL' never expected the Pastor of a 6,000 some member church to come to our house for dinner! Well, he did! So did his wife and two other great friends. We are so blessed. For the record, this dinner meant more than just entertaining and showing off my culinary skills, or lack of ... but, for the sake of this food blog, we'll stick to the point at hand which is, of course, food, babies, food!
Always looking for a chance to try a new recipe, I knew exactly which one I'd make for this group of people. (Insert taunting voice of my mother "I told you to never try new recipes on people.") I have ear marked several recipes from Oh-You-Guessed-It: Fine Cooking Magazine to try the next time we have company, so I jumped at the chance to make this succulent Cherry Stuffed Pork Tenderloin while it's still summer! It's not my recipe, so I can rave all I want about it, I only followed the directions.. thanks Fine Cooking for the awesome tenderloin!
A couple of notes about this recipe before I get all business-like and cut-copy-and-paste the recipe from the website. ;)
1. If you're ever making a stuffed chicken breast or pork tenderloin, get a meat mallet. Yes, you can certainly use a frying pan, but trust me, it will make life easier.
2. You must, must, must use kitchen twine at one-inch intervals. Your 'stuff' will fall out if not, so take it from me, do it!
3. This recipe looks complicated because there's a lot of ingredients. Don't skimp! FYI 6 TBSP of freshly squeezed orange juice is about all you're going to get out of just one orange and then you zest the top layer for a kick in the cherry mixture. It's worth squeezing it yourself and not leaving out the zesty goodness of the orange.
4. Use a cheese grater to zest your orange. Keep your knuckles away from the sharp edges though ... yes, that's why I'm walking around with not one ... not two ... but three Band-aids around my right thuckle.
5. Butterflying any piece of meat is kind of like being good at basketball. The more you do it, the better you get. Start with chicken breast and work your way up to a tenderloin. Here's a helpful hint though: Holding the knife horizontal to the cutting board, slit the tenderloin lengthwise. Don't cut all the way through to the other side, but just far enough that you can open it like a book. Another helpful hint: yours won't look like the pictures either ... mine didn't but the end result was still beautiful. ;)
6. I did my own version of gravy. I followed the recipe until the end and I used the drippings from the cooked tenderloin to flavor it up. Ehh, a little fattening, but wonderful.
Happy Cooking!
Serves 6
Cherry and Onion stuffed pork tenderloin
2 lb (or larger) Pork Tenderloin
3 TBS Oilive OIl
1 1/2 Medium onions, thinly sliced
6 TBS freshly squeezed orange juice
1 1/2 Cups fresh sweet cherries (about 8 oz)
Kosher Salt and Pepper
1/8 TSP ground cloves (you can totally omit these and won't miss 'em)
1/2 Cup dry white wine (you can just use more chicken broth if you want)
1 C lower-salt chicken broth (one can will be enough if you use broth instead od win)
1 TSP fresh rosemary (I wish I had used fresh Rosemary, the dried stuff didn't get as soft in the gravy as I would have liked)
2 TBS. Cold unsalted butter, cut into small pieces
Kitchen Twine
Meat Mallett
1. Heat 1 TBS olive oil in 12-inch skillet over medium-low heat. Add the onions and cook, stirring occasionally, until softened and light golden, 10 - 15 minutes. Add the orange juice, vinegar, sugar and orange zest, reduce the heat to low, cover and continue to cook until the onions are very soft, 15-20 minutes more. Uncover and continue to cook until all the liquid has evaporated, about 5 minutes more. Add the cherries and season to taste with salt and pepper. Cool to room temp.
2. Heat the oven to 425. Meanwhile, butterfly the pork by slitting each tenderloin lengthwise just far enough that it opens like a book to make a flat piece. Place the pork between two pieces of plastic wrap or waxed paper and pound gently with a meat mallett to flatten it to a 3/8-inch thickness. In a small bowl, mix 1 TBS of olive oil and ground cloves and 1/4 TSP black pepper.
Rub the mixture on both sides of the pork and season generously with salt.
3. Divide and spread the cherry mixture evenly over the tenderloins and roll them back to their original shape. Tie them with kitchen twine at 1 inch intervals.
4. Heat the remaining 1 TBS olive oil in same skillet as before over medium high heat. Brown the pork on all sides until golden, 5-6 minutes. Transfer the skillet to the oven and roast until an instant-read thermometer inserted in the thickest part of a tenderloin reads 145, 10 - 12 minutes. Transfer the pork to a cutting board and tent with foil.
5. Set the skillet over medium high heat, add the wine and deglaze the pan by scraping up the cooked bits with a wooden spoon. Add chicken broth and rosemary, bring to a boil and reduce by half 2-3 mintes. Reduce the heat to low and stir in the butter once piece at a time, letting each melt before adding the next. Season to taste with salt and pepper.
**When you take the pork out of the oven, there's juice in the bottom, pour it into your gravy mix, stir and let it sit.
Remove the strings from the pork and slice it into 3/4 inch thick slices. Drizzle sauce over and serve warm.
Asparagus Vinaigrette
2 Pounds fresh asparagus, trimmed
3 TBS Olive Oil
2 TBS Lemon Jice
2 TSP Dijon mustard
1/2 TSP pepper
1/4 TSP Salt
4 TBSO Toasted Breadcrumbs (pine nuts work too)
6 cherry tomatoes, halved
Did you know using a potato peeler on the ends of asparagus once trimmed makes them more tender? Marinate the asparagus in this vinaigrette until ready to cook Pour contents of entire bowl into sauté pan. When done, sprinkle toasted pine nuts and cherry halves on top of asparagus. Beautiful!
Summer Salad (Inspired by Griff's Deli in Bowling Green, KY)

Adjust to your taste and how many you're serving
Green Leaf Lettuce
Feta Cheese
Cranberries
Chopped Cherries
Pecans
Croutons
Balsalmic Vinaigrette from store
Flat Bread
How many times can I serve this? Yup, you guessed it. I made the flat bread a few weeks ago, froze it and re-baked it to serve when I have company. It tasted just the same as it did fresh out of the oven. Certainly worth the time spent in the kitchen when I know I'm going to have fresh bread for guests without having to make it that day! Check out my post on it.
Enjoy, Mangia! Mangia!
Tank's Steak Sandwiches
We invited friends over last week for dinner (I know, I'm late getting a blog post up, what's wrong with me?) and lucky for me, they cooked! What a treat! Don't get me wrong, you know how much I love to entertain, but with my trip to Spain on the horizon and other parties to plan, I was glad to let someone else do the cooking!
Meet Tank.

Need I say more? You know I never use real names when blogging about other people (Have you met Picky Pants?) so, I'm glad this cook already came with a pre-determined nick-name: We love Tank and his wonderful cooking. His wife volunteered his famous Steak Sandwiches and Even-More-Famous-Guacamole last week for dinner. OMG I'm drooling just by typing the words. All I can say is: try them. Tonight! As you'll see from the list of ingredients, there's not much to it! Great news, right? Well, there may not be many ingredients to grab at the store, but the specialty comes in how you prepare these juicy sandwiches. No worries, all explained below.
Tank's Steak Sandwiches
Serves 4 (adjust proportions if needed, of course)
1 lb. flat iron steak
2-3 red, yellow, orange or green bell peppers (we used all colors)
6-8 Yukon Gold potatoes, 2 potatoes a person (cut into "fingers")
Hoagie Rolls
Provolone Cheese
Salt Pepper
Canola Oil
Mix together a bit of Canola Oil, Salt and Pepper and rub all over steak, front and back. Grill on medium to high heat about 5 minutes each side or to preferred temperature. Let the meat rest for 5 minutes. When slicing, go against the grain with a very sharp knife and slice it so thin it's almost shaved. The thin strips of meat on your sandwich are what creates the perfect texture. You don't want a hunk of meat you have to chew for 10 minutes before swallowing! Eww! See how thin and pretty Tank's steak looks?

PEPPERS
While you're grilling, (or in my case while Tank was grilling) I sliced up the peppers and onions after he roasted them on the grill for a few minutes. Cover your peppers in oil and set them on the grill for a few minutes each side, until almost blackened and a bit soft. Peel the outer layer and begin slicing.
* Or, if you want to sauté them in a pan, slice and sauté in Olive Oil until tender. Keep warm and set aside.
POTATOES
Slice Potatoes into large chunky "fingers." Drizzle with oil, salt and pepper. Cover with foil and grill. Juicy Potato fries, baby, yum!
BREAD
Brush Olive Oil over Hoagie's, open faced and broil for 3-4 minutes or until golden brown.
ASSEMBLE
Place Provolone on hot bread, steak, peppers and take a big, juicy bite. Mangia! Mangia! So good!
Too bad I had already stuffed myself with Tank's Guac I only had 1/2 of his wonderful steak sandwich!! I'm telling you, best Guac I've ever had. Try it.
Tank's Guac, in his own words:
Serves: a Hell of a lot

8 Ripe avocados
1/2 C Cilantro
2 Jalapeño Peppers, chopped
Juice of 1 lime
1 Chopped Medium red onion
Drizzle of olive oil
Teaspoon ground Cumin
Salt and course pepper
1. Slice avocado lengthwise and around the pit. Spoon around the edges to get a clean half of the avocado out of its' shell. Discard the pit. Mash the avocado into chunky bits in a bowl. Mix in ingredients. Taste. Savor. Adjust where needed.
Have a great week, Mangia! Mangia!
Next Post: Cherry Stuffed Pork Tenderloin
Meet Tank.

Need I say more? You know I never use real names when blogging about other people (Have you met Picky Pants?) so, I'm glad this cook already came with a pre-determined nick-name: We love Tank and his wonderful cooking. His wife volunteered his famous Steak Sandwiches and Even-More-Famous-Guacamole last week for dinner. OMG I'm drooling just by typing the words. All I can say is: try them. Tonight! As you'll see from the list of ingredients, there's not much to it! Great news, right? Well, there may not be many ingredients to grab at the store, but the specialty comes in how you prepare these juicy sandwiches. No worries, all explained below.
Tank's Steak Sandwiches

Serves 4 (adjust proportions if needed, of course)
1 lb. flat iron steak
2-3 red, yellow, orange or green bell peppers (we used all colors)
6-8 Yukon Gold potatoes, 2 potatoes a person (cut into "fingers")
Hoagie Rolls
Provolone Cheese
Salt Pepper
Canola Oil
Mix together a bit of Canola Oil, Salt and Pepper and rub all over steak, front and back. Grill on medium to high heat about 5 minutes each side or to preferred temperature. Let the meat rest for 5 minutes. When slicing, go against the grain with a very sharp knife and slice it so thin it's almost shaved. The thin strips of meat on your sandwich are what creates the perfect texture. You don't want a hunk of meat you have to chew for 10 minutes before swallowing! Eww! See how thin and pretty Tank's steak looks?

PEPPERS
While you're grilling, (or in my case while Tank was grilling) I sliced up the peppers and onions after he roasted them on the grill for a few minutes. Cover your peppers in oil and set them on the grill for a few minutes each side, until almost blackened and a bit soft. Peel the outer layer and begin slicing.
* Or, if you want to sauté them in a pan, slice and sauté in Olive Oil until tender. Keep warm and set aside.
POTATOES
Slice Potatoes into large chunky "fingers." Drizzle with oil, salt and pepper. Cover with foil and grill. Juicy Potato fries, baby, yum!
BREAD
Brush Olive Oil over Hoagie's, open faced and broil for 3-4 minutes or until golden brown.
ASSEMBLE
Place Provolone on hot bread, steak, peppers and take a big, juicy bite. Mangia! Mangia! So good!
Too bad I had already stuffed myself with Tank's Guac I only had 1/2 of his wonderful steak sandwich!! I'm telling you, best Guac I've ever had. Try it.
Tank's Guac, in his own words:
Serves: a Hell of a lot

8 Ripe avocados
1/2 C Cilantro
2 Jalapeño Peppers, chopped
Juice of 1 lime
1 Chopped Medium red onion
Drizzle of olive oil
Teaspoon ground Cumin
Salt and course pepper
1. Slice avocado lengthwise and around the pit. Spoon around the edges to get a clean half of the avocado out of its' shell. Discard the pit. Mash the avocado into chunky bits in a bowl. Mix in ingredients. Taste. Savor. Adjust where needed.
Have a great week, Mangia! Mangia!
Next Post: Cherry Stuffed Pork Tenderloin
Homemade Bread Stuffed with Herbs and Cheese
Friday, July 23, 2010
I have been DYING to try this new recipe from Fine Cooking Magazine and boy am I glad I did! Crusty bread filled with bright green pesto and creamy farmer's cheese ... are you salivating yet? Well, I am!
First, a note about Farmer's Cheese. Ever heard of it? Me neither. Glad Fine Cooking is broadening my cheese palette though. After a short Google search, I found out Farmer's Cheese is a soft white cheese made all over the world. It has a very mild flavor and could be melted, sliced or crumbled to finish off your dish. I like the flavor so much I think I'll serve it with crackers at my next gathering! It reminds me of Muenster Cheese. I used to always eat Muenster instead of American on sandwiches growing up, once I popped a piece of the Farmer's Cheese in my mouth, the flavor took me back to my Mom's kitchen in Orlando, Florida where I'm pretty sure the 1980's apron was born. (Okay, Okay, I'll post a pic soon!)
Onto the bread! I basically followed the recipe in Fine Cooking, although I was lazy and used pesto from a jar instead of the herb mixture from scratch they suggested. I'll post the recipe in case you want to try it.
We served this for some friends over dinner last week and the bread was a hit! Seriously, if you're already going to the trouble of making bread, why not stuff it with some yummy surprises!?
Grilled Naan Filled with Herbs and Cheese
Makes 10 Naans - it could make more, I felt like I could get 12 out of the batch
For the Dough
1 lb or 7.5 oz unbleached all purpose flour
4 TSP. baking powder
4 TSP. Kosher Salt
2 TSP Granulated Sugar
1/2 Cup plain whole-milk yogurt
1 large egg
1/4 Cup peanut or Canola oil, more for brushing (I used Olive Oil)
For the Filling
1 1/2 Cups roughly chopped fresh cilantro
1/2 Cup roughly chopped fresh mint
1/4 Cup unsalted cashews
2 Cloves garlic, chopped
1 TBS Chopped fresh ginger
1 tsp Kosher salt
6 TBS Peanut or Canola Oil, I used Olive Oil
2/3 Cup farmer cheese or queso fresco
Kosher Salt for sprinkling
Make the Dough
Combine the flour, baking powder, salt and sugar in the bowl of a stand mixer fitted with a dough hook. Whisk the yogurt and egg in a medium bowl, then whisk in 1 1/2 Cups of lukewarm water and add the oil. Pour the egg mixture into the flour mixture and mix on low speed until a soft, sticky dough starts to clump around the hook, about 5 minutes. If the dough seems too wet, add more flour, 1 tsp at a time. Line a baking sheet with parchment and dust lightly with flour. Turn the dough out onto a lightly floured surface and divide it into a ball and arrange them on the baking sheet. Lightly brush the dough with oil, cover with plastic and let rest at least 1 hour and up to 2 hours before shaping.
Make the Filling
Combine the cilantro, mint nuts, garlic, ginger and salt in a food processor. Pulse until the ingredients are finely chopped. Scrape the sides of the bowl, turn the processor back on and pour the oil through the feed tube, mixing until incorporated. Transfer to a medium bowl.
Make and Grill the Bread
On a lightly floured surface, roll a dough ball into a 5 inch circle. spread about 2 tsp. of the grilling around the center, leaving a 1/2 inch border. Scatter 1 TBS of the crumbled cheese over the filling. Gather the border to form a pouch, pinching it to seal in the filling. Turn the pouch pinched side down and using very light pressure, roll into a 6 inch circle. Transfer to a parchment lined baking sheet. Continue filling and shaping the dough, layering parchment between the breads if you stack them.
GRILL
Brush the grill grates with a stiff brush, then wipe with lightly oiled paper towel. Grill the breads in batches pinched side down, covered, until they look puffy and the undersides brown slightly in places 2 - 3 minutes. Turn over and cook the other side, covered until grill marks form and the breads are cooked through about 2-4 minutes. Just before taking them off the grill, turn the breads pinched side down and brush lightly with butter. Sprinkle with a pinch of salt. Cut each bread in half and serve warm.
I can't BELIEVE I didn't take a picture with the bread cut in half so you could see the melted cheese and herbs. Sorry! Next time! It was delish!
Enjoy and Mangia! Mangia!
Double Spaghetti Dinner
Tuesday, July 13, 2010

There are a few things I try to ALWAYS have in my kitchen. They aren't the normal "staples" others may consider useful in their kitchens, but "Courtney's Staples" are definitely a must in mine. If you try this recipe, I bet you'll start keeping this list of goodies nearby.
1. Olive Oil - I very rarely ever use any other kind of oil, and you know what? I strongly disagree with all this talk about Canola oil being the new healthy oil. I'm checking my credentials at the door when I say this because, well, I don't have any. But Virgin oil from fresh olives to me, is the most natural oil you're going to get. Where does Canola come from anyway?! And don't get me started on Vegetable Oil. But, yes, you will find it in my pantry. 'Tis true. I try not to use it, but you gotta have it sometimes.
2. Minced Garlic - Eh, sometimes I'm lazy, who isn't? It's the perfect flavor in a hurry. Try not to buy the kind packed in oil. And the roasted minced garlic in a jar is great on bread under the broiler for a few minutes.
3. Fresh Garlic - My Italian Grandfather used to cut the top of a garlic bulb, pour a little Olive Oil and bake. Once all the little cloves are soft, he'd squeeze the garlic-mush onto bread. Best garlic bread I've ever had. Swear. If you always have fresh garlic on hand, you'll always find a way to use it in food. Plus, despite the odor, it's good for you!
4. Pine Nuts - Love a little crunchy-nutty-protein surprise in my veggies - try them on asparagus or green beans too! Sauté them in a little oil and set aside, then sprinkle on top of your dish. Too easy!
5. Grated Parmesan Cheese - Not the kind in a bag, the kind in a little container. Or better yet, grate it yourself. Either way, it's so versatile and a must when making a quick pasta dish.
6. A Whole Wheat Grain (Pasta, Quinoa, Rice, etc.) The pasta/grain never has to take center stage of your meal, it should be a side dish.
7. Dried Minced Onion - Obviously if you've read this far, you know I like strong flavors (and bad breath, right?!) But, minced onion is another quick and lazy way to get a little more flavor or spice into your food. I just sprinkle it in when I think I need it ... and sometimes I just have a-what-the-heck-moment and sprinkle it when I probably don't need to, still tastes good to me!
**8. And, starting this summer, FRESH Basil and Parsley from a small pot I use on my back deck. What did I do before my bount-ilicious pot full of fresh herbs? I've been using fresh basil on summer tomato sandwiches, in salads and tonight, in the pasta. I'm going to try to keep an indoor herb pot this winter, but I'm still trying to figure out how to make it look okay in my kitchen. Will need input from friends. =)
This recipe is another great one from Teresa Giudice. It came out of her book Skinny Italian. I'm excited to share this recipe with you for two reasons: Zucchini is in season and it's healthy!
Sauteed Zucchini "Spaghetti" with Pine Nuts
Makes 4 servings
2 TBSP Pine Nuts
3 Large Zucchini, scrubbed and ends trimmed
1 TBSP Extra Virgin Olive Oil
1 Garlic clove, minced
1/4 TSP Salt
1/4 TSP Ground black pepper
1. Heat a large skillet over medium heat. add the pine nuts and cook, stirring often, until toasted, about 2 minutes. Transfer to a plate and set aside.
2. Using a mandoline, plastic V slicer, or spiral slicer, cut the zucchini into long thin julienne strips. Do not use the seedy center of the zucchini, as it can be too soft and will ruin the look and texture of the strips.
3. Heat the oil and garlic together in the skillet over medium heat, stirring occasionally, until the garlic is tender, about 1 1/2 minutes. Increase the heat to high. add the zucchini and cook, stirring occasionally, just until it is heated through and still al dente, about 1 minute. Don't overcook the zucchini, or it will get mushy. Remove from heat and stir in pine nuts, salt and pepper. Serve hot.
Courtney's Quick Pasta
The ingredients below are a healthier way to eat what I like to call "Child Pasta." Do you remember going to your Grandparents house and having spaghetti, butter and Parmesan cheese? Okay, well the not-so-Italian Grandparents from the other side of our family made it for us and we LOVED it. Actually, I'm pretty sure if I made it for Picky Pants he'd love it too. But, I refuse and it's just as well because he loves his pasta the healthy way. To me, if you start cooking like this at the very beginning, your picky eaters will never know there's a much heart-attacky-greasier way to eat Quick Pasta!
Whole Wheat Pasta
Salt
Olive Oil
Minced Garlic
Pepper
Basil
Parmesan Cheese
1. Salt a pot of water before boiling. Boil pasta until al dente. Drain but do not rinse. Using the same pot, drizzle oil and rest of ingredients and stir. Taste. Adjust for flavor. You can also add chicken or shrimp to this dish for protein.
Mangia! Mangia and lots of XXOO!!
The Hamburgler took over my Birthday Cake!
Thursday, July 8, 2010
Let's pretend I had never baked a cake in my life. Let's pretend I never cook. If today had been my first experience in the kitchen, I may have yanked off my Mom's 1985- red-and-white-gingham-and-lace-sweetheart-front-apron and hung it up by it's cute, pearly buttons in the corner of my kitchen. It would have hung in the kitchen on a hook in all its' tacky gloriousness, mocking me for what happened today. For those of you who have never seen my apron, it's awesome. It really is my Mom's and I'm pretty sure she got it in 1985. It should have a name, any suggestions?
I'm going to the lake for my birthday, a place where big, beautiful cakes do not belong. I didn't want to spend too much time on my cake for fear of it falling in the water, or melting. (Those of you who know I've dropped my Iphone in water twice know where I'm coming from.) But, I do want to feel like a kid again and have a real-live birthday cake I made with love for all my friends and husband to enjoy. Well, I guess I have that, thanks to The Cake Doctor. But, it's not too pretty!

When it comes to cakes and frosting... I rarely start with a box, but there's certainly nothing wrong with it. My Mom gave me "The Cake Doctor Returns" for Christmas this year. It's a cookbook filled with desserts: pound cakes, bundt cakes, layer cakes, cupcakes, bars, brownies, and cookies. The author, Anne Byrn, is known for starting her recipes with a box mix but "doctoring" it up, to make it taste homemade and not generic. This is my first experience with Byrn's bright ideas and this recipe was definitely harder than it looked. However, I remember my Mom baking some knock-out cakes from Byrn's previous book a few times growing up... maybe I'll give it another shot. Well, sifting through the beautiful pictures, I earmarked about 7 ideas for my birthday cake. I tossed the ideas back and forth with my Mom and some friends. I settled upon "Smith Island Cake" for it's Reese's peanut butter cup topping and beautiful layers of vanilla cake with fudgy chocolate icing.
Smith Island Cake, according to The Cake Doctor, comes from Maryland's Smith Island. It's famous for thin layers of yellow cake. You achieve these thin layers by baking 4 rounds, then splitting them in half horizontally. She even states in the book: "Splitting layers has nothing to do with splitting hairs" ... I beg to differ Cake Doctor!! My cake looks like the Hamburgler threw up all over it! I'm sure it tastes fabulous, it should for the amount of time I spent on those layers.

For the Cake
8 Reese's peanut butter cups
Spray for misting the pans
Flour for dusting the pans
1 package IGA plain yellow cake mix
1 1/2 C evaporated milk or whole milk
8 TBSP (1 stick) butter
1 TSP Vanilla Extract
4 Large Eggs
For the Frosting
12 TBSP (1 1/2 sticks) butter
1/2 C Unsweetened Cocoa Powder
1/2 C unsweetened cocoa powder
1/2 C Plus 3 TBSP evaporated milk
1 TSP Vanilla
6 C Confectioners' sugar, SIFTED
1. Place the peanut butter cups in freezer.
2. Make the cake: Place a rack in the center of the oven and preheat to 350. Lightly mist four 9-inch round cake pans with spray, then dust them with flour. Shake our the excess flour and set pans aside.
3. Place cake mix, 1 1/2 C milk, 8 TBSP butter, 1 TSP vanilla, and the eggs in a large mixing bowl and beat with an electric mixer until well mixed, 30 seconds. Stop the machine and scrape down the side of the bowl with rubber spatula. Increase the mixer speed to medium and beat until the batter is smooth, 1 1/2 minutes longer, scraping down the side of the bowl again if needed. Divide the cake batter evenly among the 4 prepared cake pans, about 1 3/4 cups of batter per pan, smoothing the tops with a rubber spatula. Put the pans in the oven, placing 2 pans on the center rack and 2 on the rack above.
4. Bake the cake layers until they are golden brown and the tops spring back when lightly pressed with a finger, 10 - 12 minutes (The baking time is short here because the batter has been divided among 4 baking pans). Rotate the pans after the layers have baked for 5 minutes. Transfer the cake pans to wire racks and let the cake layers cool for 5 minutes. Run a dinner knife around the edge of each cake layer and give the pans a good shake to loosen the cakes. Invert each layer onto a wire rack, then invert it again onto another rack so that the cakes are right side up. Let the layers cool completely. 10 - 15 minutes.
5. meanwhile, remove the peanut butter cups from the freezer. Place 3 peanut butter cups in a good processor, pulse the machine to make small chunks, and set these aside for garnish. Pulse the remaining 5 peanut butter cups to a fine powder and set aside.
6. make frosting: Melt the 12 TBSP butter in large saucepan over low heat, 2 - 3 minutes. Stir in the cocoa powder and 1/2 C plus 3 TBSP milk. Cook 1 minute longer, stirring until the mixture thickens and just begins to come to a boil. Remove the pan from the heat. Stir in the 1 TSP Vanilla and confectioner's sugar continuing to stir until frosting is thickened and consistency of hot fudge sauce. To keep the icing from hardening, place the saucepan over low heat while frosting the layers.
7. To assemble the cake, using a long, serrated knife, carefully slice each cake layer in half horizontally to make 8 layers. Place the bottom half of one layer, cut side up, on a cake plate and spoon about 1/4 Cup of the frosting on top, spreading it evenly to the edge.
Sprinkle about 1 TBSP of the powdered peanut butter cups over the frosting. Place the top half of this layer, right side up, over the frosting. add another 1/4 C of the frosting and spread it to the edge. Then sprinkle another TBSP of powdered peanut butter cups over it. Repeat with the remaining layers, then frost the top of the cake and sprinkle the reserved chunks of peanut butter cups over it.
I hope I don't sound too harsh! It's probably a delicious cake! The layers were harder to cut in half than she led on in her book and I even cheated in the middle by NOT cutting one of the layers in half. So, I think my layer birthday cake is 6 layers instead of 8. I think we will enjoy it and I will definitely re-post my thoughts when I get back from the lake. Enjoy your day! And as always, Mangia! Mangia! xxoo
I'm going to the lake for my birthday, a place where big, beautiful cakes do not belong. I didn't want to spend too much time on my cake for fear of it falling in the water, or melting. (Those of you who know I've dropped my Iphone in water twice know where I'm coming from.) But, I do want to feel like a kid again and have a real-live birthday cake I made with love for all my friends and husband to enjoy. Well, I guess I have that, thanks to The Cake Doctor. But, it's not too pretty!

When it comes to cakes and frosting... I rarely start with a box, but there's certainly nothing wrong with it. My Mom gave me "The Cake Doctor Returns" for Christmas this year. It's a cookbook filled with desserts: pound cakes, bundt cakes, layer cakes, cupcakes, bars, brownies, and cookies. The author, Anne Byrn, is known for starting her recipes with a box mix but "doctoring" it up, to make it taste homemade and not generic. This is my first experience with Byrn's bright ideas and this recipe was definitely harder than it looked. However, I remember my Mom baking some knock-out cakes from Byrn's previous book a few times growing up... maybe I'll give it another shot. Well, sifting through the beautiful pictures, I earmarked about 7 ideas for my birthday cake. I tossed the ideas back and forth with my Mom and some friends. I settled upon "Smith Island Cake" for it's Reese's peanut butter cup topping and beautiful layers of vanilla cake with fudgy chocolate icing.
Smith Island Cake, according to The Cake Doctor, comes from Maryland's Smith Island. It's famous for thin layers of yellow cake. You achieve these thin layers by baking 4 rounds, then splitting them in half horizontally. She even states in the book: "Splitting layers has nothing to do with splitting hairs" ... I beg to differ Cake Doctor!! My cake looks like the Hamburgler threw up all over it! I'm sure it tastes fabulous, it should for the amount of time I spent on those layers.

For the Cake
8 Reese's peanut butter cups
Spray for misting the pans
Flour for dusting the pans
1 package IGA plain yellow cake mix
1 1/2 C evaporated milk or whole milk
8 TBSP (1 stick) butter
1 TSP Vanilla Extract
4 Large Eggs
For the Frosting
12 TBSP (1 1/2 sticks) butter
1/2 C Unsweetened Cocoa Powder
1/2 C unsweetened cocoa powder
1/2 C Plus 3 TBSP evaporated milk
1 TSP Vanilla
6 C Confectioners' sugar, SIFTED
1. Place the peanut butter cups in freezer.
2. Make the cake: Place a rack in the center of the oven and preheat to 350. Lightly mist four 9-inch round cake pans with spray, then dust them with flour. Shake our the excess flour and set pans aside.
3. Place cake mix, 1 1/2 C milk, 8 TBSP butter, 1 TSP vanilla, and the eggs in a large mixing bowl and beat with an electric mixer until well mixed, 30 seconds. Stop the machine and scrape down the side of the bowl with rubber spatula. Increase the mixer speed to medium and beat until the batter is smooth, 1 1/2 minutes longer, scraping down the side of the bowl again if needed. Divide the cake batter evenly among the 4 prepared cake pans, about 1 3/4 cups of batter per pan, smoothing the tops with a rubber spatula. Put the pans in the oven, placing 2 pans on the center rack and 2 on the rack above.
4. Bake the cake layers until they are golden brown and the tops spring back when lightly pressed with a finger, 10 - 12 minutes (The baking time is short here because the batter has been divided among 4 baking pans). Rotate the pans after the layers have baked for 5 minutes. Transfer the cake pans to wire racks and let the cake layers cool for 5 minutes. Run a dinner knife around the edge of each cake layer and give the pans a good shake to loosen the cakes. Invert each layer onto a wire rack, then invert it again onto another rack so that the cakes are right side up. Let the layers cool completely. 10 - 15 minutes.

5. meanwhile, remove the peanut butter cups from the freezer. Place 3 peanut butter cups in a good processor, pulse the machine to make small chunks, and set these aside for garnish. Pulse the remaining 5 peanut butter cups to a fine powder and set aside.
6. make frosting: Melt the 12 TBSP butter in large saucepan over low heat, 2 - 3 minutes. Stir in the cocoa powder and 1/2 C plus 3 TBSP milk. Cook 1 minute longer, stirring until the mixture thickens and just begins to come to a boil. Remove the pan from the heat. Stir in the 1 TSP Vanilla and confectioner's sugar continuing to stir until frosting is thickened and consistency of hot fudge sauce. To keep the icing from hardening, place the saucepan over low heat while frosting the layers.
7. To assemble the cake, using a long, serrated knife, carefully slice each cake layer in half horizontally to make 8 layers. Place the bottom half of one layer, cut side up, on a cake plate and spoon about 1/4 Cup of the frosting on top, spreading it evenly to the edge.

Sprinkle about 1 TBSP of the powdered peanut butter cups over the frosting. Place the top half of this layer, right side up, over the frosting.
 add another 1/4 C of the frosting and spread it to the edge. Then sprinkle another TBSP of powdered peanut butter cups over it. Repeat with the remaining layers, then frost the top of the cake and sprinkle the reserved chunks of peanut butter cups over it.
I hope I don't sound too harsh! It's probably a delicious cake! The layers were harder to cut in half than she led on in her book and I even cheated in the middle by NOT cutting one of the layers in half. So, I think my layer birthday cake is 6 layers instead of 8. I think we will enjoy it and I will definitely re-post my thoughts when I get back from the lake. Enjoy your day! And as always, Mangia! Mangia! xxoo
I've been lost, but now I'm found!
Wednesday, July 7, 2010
Hello friends! I've missed you! Just a heads up, my computer has been out of commission and I've been operating solely off my phone (thank Goodness for IT!) My computer is back and so am I! I'm making my birthday cake tomorrow and PROMISE to upload pictures and a nice, long blog. (I know you've been so patiently waiting for it)
Love love and Mangia! Mangia!
courtney
Love love and Mangia! Mangia!
courtney
Spicy Chicken Salad with Warm Chipotle Vinaigrette
Tuesday, June 22, 2010

It's hot!!! Too hot to cook, even for me!! Okay fine, you're right, this is another recipe you have to make on a hot stove, but it's light, spicy and worth the minimal heat in the kitchen. ((Insert old cliche: if you can't take the heat, get out of the kitchen ... wah-wah, I know, lame joke.))
This recipe came from my latest food obsession: Fine Cooking. It's not in their magazine, but online. I try to take decent pictures of my food, but if you want a better visual - go to their website, but please, make sure to come back to mine!
Picky Pants had a birthday recently and I thought this recipe was perfect to make on a special occasion that just so happened to fall on one of the hottest days of the year. Well, think again. Picky Pants wanted chicken fried rice for his B-day dinner. So much for trying to stay out of the kitchen! I made the Spicy Chicken Salad with Warm Chipotle Vinaigrette the next day - and we both drooled over it for a few reasons: It was fantastic! It was pretty and it was spicy!
I'll have to admit the recipe looks a little daunting because there are a lot of ingredients in the vinaigrette. However, with salad dressing getting a bad reputation these days from high fructose corn syrup, trans fats and extra calories, making my own vinaigrette appealed to me on many different levels. It should for you too, c'mon, it's worth a try!
If you remember my post about the rustic Italian flat bread I made last week, I broke two of them in half and served with the salad. I love recipes that make more than I need. I always freeze and have it on hand when I need it. As for the flat bread, I believe I have 6 more pieces for another night. ;) Always nice to have something homemade to serve to guests.
6 oz baby romaine
1/4 lb iceberg lettuce, thinly sliced, washed and spun dry 2 cups
1/2 Cup loosely packed fresh cilantro leaves
1 chipotle chile (from can of cipotles in adobo sauce) chopped, plus 2 TBS adobo sauce
3 oil-packed sun dried tomatoes, drained and chopped
1 TBS balsamic vinegar
2 TSP light brown sugar
1 TSP Dijon mustard
1/2 Cup plus 3 TBS EVOO
Salt Pepper
2 TBS All purpose flour
2 TBS Fine cornmeal
1 TBS Chili Powder
1 TSP Ground Cumin
1-1/4 lb boneless skinless chicken breasts cut into 1 inch thick strips
1/2 small red onion, thinly sliced into half moons (I omitted these: Picky Pants)
1 ripe avocado, cut into 3/4 inch dice
1-1/2 C cooked fresh or thawed frozen corn kernels (from about 2 ears) (I accidentally forgot these)
1 lime cut into quarters
Toss the romaine, iceberg and half the cilantro in a large bowl. In a blender or food processor, puree the chipotle chile and adobo sauce, sun dried tomatoes, vinegar, brown sugar and mustard. With the machine running, slowly pour in 1/2 cup of the oil. Transfer to a measuring cup, season to taste with salt and pepper.
In a shallow dish, mix the flour, cornmeal, chili powder, and cumin with 1-1/2 tsp. salt and 1/2 tsp black pepper. Season the chicken with 1 tsp salt and then dredge in four mixture.
Heat 2 tbs of remaining oil in skillet over medium high heat until it's shimmering, about 1 minute. Add half of the chicken strips, evenly spaced, and cook until strips are just cooked without touching for 2 minutes. Cook through until firm to the touch. Transfer to a large plate lined with paper towels and sprinkle with salt. Reduce heat to medium, add the remaining 1 TBS oil and cook the remaining strips in the same manner
Discard the fat from the pan and wipe it clean with paper towels. Set the pan over low heat, add the vinaigrette and cook stirring witha wooden spoon. return the vinaigrette to a liquid measuring cup and whisk to recombine.
Gently toss the greens with the vinaigrette enough to lightly coat. Portion among four plates and top with the chicken, onion, avocado, corn and remaining 1/4 cup cilantro. Drizzle some of the remaining vinaigrette and serve with lime wedges to squeeze over salads.
Mangia! Mangia!
Greek Burger with White Sauce
Monday, June 14, 2010

WOW -- on so many fronts! Sometimes I'm a little disorganized, so I don't always plan out meals when I grocery shop. That's probably why I'm such a big fan of throwing things together. I went grocery shopping yesterday and picked up ground chicken. I had no idea what I'd do with it, but stuck it in my cart anyway. I did some googling this afternoon for a greek chicken burger on the All Recipes website and sifted through my refrigerator and BINGO! I had all the ingredients! After reading some of the reviews, I decided to make a Cucumber-Dill sauce to accompany the burger (you know like Tzatziki sauce in a Greek restaurant.)Oh, but wait. I didn't have a cucumber. So, here again, my disorganization actually comes in handy. Kind of. So, I threw together enough ingredients to make it taste similar and called it "White Sauce." (Partly because if I called it "onion sauce" Picky Pants wouldn't eat it and partly because if I called it "onion sauce" you wouldn't try it)
Tee-hee!
If you know my husband, you know he likes his burgers plain. In fact, when he goes to get a burger at a drive-thru (ew, right?) his orders sound something like this: "2 Hamburgers, totally plain. Bun, Burger, Bun." Some of our friends even call him "Bun, Burger, Bun." I'll stick to Picky Pants. He always orders two hamburgers, throws one of the buns away and eats a double-decker burger, totally plain with one bun. He says he's a growing man and he needs a lot of protein. I'm like: really baby? It's McDonalds. we aren't even sure if it's real meat. Just kidding, kind of.
So, tonight, I served Picky Pants this plate for one reason and one reason only: to get a picture for my blog. Well! Wouldn't you know, by the time I snapped the picture he took the entire burger in his hands and ate ALL OF IT!

He ate it without removing the bun and picking out the spinach and he ate it without questioning the White Sauce. Have I died and gone to heaven or is my boy growing up? Tip - if you chop the onions fine enough, even the pickiest eaters will eat them!
Greek Burger
1 lb Ground Chicken
1/2 C Italian Bread Crumbs
1 egg
1 TSP Fresh Thyme
1 TSP Fresh Basil
Salt
Pepper
2 TBSP Chopped Sun Dried Tomatoes from a jar
Feta Cheese
1 TSP Lemon Juice >
1. Combine Chicken, bread crums, egg, lemon juice, spices and sun dried tomatoes in a bowl, mix with hands. Add Feta Cheese and mix until Feta is coverd in chicken-mix. (This way when you bite, it's like a yummy-Feta-surprise!)
2. Spray Pan (or you can grill them) and cook on medium high about 5-7 minutes on each side.
White Sauce
1 small container Plain Greek Yogurt
1/4 C finely chopped white onion
1 TSP Minced Garlic (from jar)
Dill Weed
Salt
Pepper
Splash Lemon Juice
Serve on burger on a bun with White Sauce and a few leaves of spinach.
Mangia! Mangia!
Chicken with Creamy Corn Sauce, Citrus Quinoa and Rustic Italian Flat Bread
Sunday, June 13, 2010
Even if it's just the two of us, I believe in having a sit-down meal a few times a week. No TV, No cell phones and No computer at the dinner table. I'll have to admit, I also like planning a meal to see if Picky Pants tries whatever I made for the day. Can you believe he spooned up a whole chunk of an avocado from the Citrus Quinoa and ate it? Of course, this is after he asked me what it was and what it tasted like, to which I replied, "butter." No wonder he loved it! Here's to hoping you can start hiding veggies in your dinners and making it all taste great!!
Tonight,Picky Pants and I had a fabulous meal thanks to my new favorite food magazine.
Sorry, Southern Living!
Fine Cooking magazine is now my go-to source for new recipes and kitchen tips and need I mention Fine Cooking is now following me on Twitter? Yay! This is exciting news!
On Fine Cooking's website, I started reading a blogwith an excellent flat bread recipe. I knew it would take some time so I started it while I had laundry going this afternoon. Let me begin by saying 'Old World' or in this case "Rustic" flat bread is not like the kind you buy at the store. It's crispy but slightly doughy. The browned-top is textured with fresh herbs such as Rosemary, Thyme and Basil. It's an excellent conversation piece and could be a great gift in a homemade Italian meal basket.
Rustic Italian Flat bread
Makes 16
1 C Warm Water (Microwave cold water for 1 minute)
1 tsp. Active Dry Yeast (from an envelope)
3 C All-purpose flour, plus more for surface and hands
3 TBSP Olive Oil, plus more for bowl
Coarse Salt
1 TSP Sugar
1 large egg with 1 TBSP water for egg wash
Thyme, Rosemary or Basil -- or all 3! I used Thyme and Basil.
1. Place water in medium bowl, sprinkle with yeast. Let stand until foamy, about 5 minutes. Stir in flour, oil, 2 tsp salt and sugar. Stir until dough forms
2. Turn out dough onto a lightly floured surface; knead with floured hands until smooth, about 2 minutes. Transfer to lightly oiled bowl and cover with plastic wrap. Let dough stand in warm, draft-free place until it doubles in volume. About 1 hour.
3. Preheat oven to 350. Divide dough into 16 pieces, cover with plastic. Toll 1 piece to 4X10inch on floured surface, transfer to parchment paper lined sheet. Brush with egg wash, sprinkle with sea salt and herbs. 4 pieces of flat bread per sheet. Bake 18 - 22 minutes, rotating pan 1/2 way through. Let cool on parchment paper on wire rack.

Also from Fine Cooking Magazine: Creamy Corn Sauce. Now, this is a great way to disguise veggies as a dipping sauce! Plus, it's a pretty flash of color on your plate.
1 TBS extra-virgin olive oil
1 small yellow onion, chopped
1 tsp all purpose flour
1/4 C dry white wine
1 3/4 Cup low sodium chicken broth
1 sprig fresh thyme
Kosher salt and freshly ground pepper
Heat the oil in a 4 quart saucepan over medium heat. add the onion and cook until tender but not browned, about 3 minutes. Stir in the flour and cook, stirring, for about 1 minute. Stir in the wine, bring to a boil, and cook until the wine is reduced by about half - 1 to 2 minutes. Add the broth and thyme sprig and bring to a boil. Add the corn and simmer over medium-low heat until the corn is tender, about 15 minutes. Discard the thyme sprig. Puree the corn mixture in a blender until smooth. Return puree to the pan and stir in butter, chopped thyme, 1 tsp salt and pinch of pepper. Spoon over any kind of chicken, fish or pork chops.
Picky Pants and I have been enjoying quinoa for the last few months. It needs to be "dressed" up a bit with spices but not necessarily salt! My friend and fellow blogger at Erins Food Files posted an amazing recipe for Lemon Cumin Quinoa a few months ago. Picky Pants and I loved it! I had to make my own rendition of it today since I didn't have all the ingredients on hand. Erin, thanks for the inspiration!
Citrus Quinoa
Low-Sodium Chicken Broth
Lemon Juice to taste
Ground Coriander to taste
Ground Cumin to taste
Cilantro to taste
Dash of Salt
1 Ripe Avocado
1. Make the quinoa as according to package instructions except instead of water, use chicken broth.
2. Season quinoa until desired taste
3. When you're ready to serve, chunk an avocado on top into bite size pieces. Serve immediately.
Hope you take time to sit, eat and enjoy with your family this week. Mangia! Mangia!

Tonight,Picky Pants and I had a fabulous meal thanks to my new favorite food magazine.

Sorry, Southern Living!
Fine Cooking magazine is now my go-to source for new recipes and kitchen tips and need I mention Fine Cooking is now following me on Twitter? Yay! This is exciting news!
On Fine Cooking's website, I started reading a blogwith an excellent flat bread recipe. I knew it would take some time so I started it while I had laundry going this afternoon. Let me begin by saying 'Old World' or in this case "Rustic" flat bread is not like the kind you buy at the store. It's crispy but slightly doughy. The browned-top is textured with fresh herbs such as Rosemary, Thyme and Basil. It's an excellent conversation piece and could be a great gift in a homemade Italian meal basket.
Rustic Italian Flat bread
Makes 16
1 C Warm Water (Microwave cold water for 1 minute)
1 tsp. Active Dry Yeast (from an envelope)
3 C All-purpose flour, plus more for surface and hands
3 TBSP Olive Oil, plus more for bowl
Coarse Salt
1 TSP Sugar
1 large egg with 1 TBSP water for egg wash
Thyme, Rosemary or Basil -- or all 3! I used Thyme and Basil.

1. Place water in medium bowl, sprinkle with yeast. Let stand until foamy, about 5 minutes. Stir in flour, oil, 2 tsp salt and sugar. Stir until dough forms
2. Turn out dough onto a lightly floured surface; knead with floured hands until smooth, about 2 minutes. Transfer to lightly oiled bowl and cover with plastic wrap. Let dough stand in warm, draft-free place until it doubles in volume. About 1 hour.
3. Preheat oven to 350. Divide dough into 16 pieces, cover with plastic. Toll 1 piece to 4X10inch on floured surface, transfer to parchment paper lined sheet. Brush with egg wash, sprinkle with sea salt and herbs. 4 pieces of flat bread per sheet. Bake 18 - 22 minutes, rotating pan 1/2 way through. Let cool on parchment paper on wire rack.

Also from Fine Cooking Magazine: Creamy Corn Sauce. Now, this is a great way to disguise veggies as a dipping sauce! Plus, it's a pretty flash of color on your plate.
1 TBS extra-virgin olive oil
1 small yellow onion, chopped
1 tsp all purpose flour
1/4 C dry white wine
1 3/4 Cup low sodium chicken broth
1 sprig fresh thyme
Kosher salt and freshly ground pepper
Heat the oil in a 4 quart saucepan over medium heat. add the onion and cook until tender but not browned, about 3 minutes. Stir in the flour and cook, stirring, for about 1 minute. Stir in the wine, bring to a boil, and cook until the wine is reduced by about half - 1 to 2 minutes. Add the broth and thyme sprig and bring to a boil. Add the corn and simmer over medium-low heat until the corn is tender, about 15 minutes. Discard the thyme sprig. Puree the corn mixture in a blender until smooth. Return puree to the pan and stir in butter, chopped thyme, 1 tsp salt and pinch of pepper. Spoon over any kind of chicken, fish or pork chops.
Picky Pants and I have been enjoying quinoa for the last few months. It needs to be "dressed" up a bit with spices but not necessarily salt! My friend and fellow blogger at Erins Food Files posted an amazing recipe for Lemon Cumin Quinoa a few months ago. Picky Pants and I loved it! I had to make my own rendition of it today since I didn't have all the ingredients on hand. Erin, thanks for the inspiration!
Citrus Quinoa
Low-Sodium Chicken Broth
Lemon Juice to taste
Ground Coriander to taste
Ground Cumin to taste
Cilantro to taste
Dash of Salt
1 Ripe Avocado
1. Make the quinoa as according to package instructions except instead of water, use chicken broth.
2. Season quinoa until desired taste
3. When you're ready to serve, chunk an avocado on top into bite size pieces. Serve immediately.
Hope you take time to sit, eat and enjoy with your family this week. Mangia! Mangia!

Bellini's, Biscotti and Burgers!
Tuesday, June 1, 2010
Hope everyone spent Memorial Day with family, friends and of course, good food! What's a drink you can feel pretty drinking all day and not worry (too much) about calories? My new cooking hero, Teresa Giudice, has an awesome recipe for Bellini's (From her book, Skinny Italian) Ever had one? If not, you're missing out. Go make them today for some good girl time and great conversation!

2 ripe white peaches, peeled, pitted and coarsely chopped
1/4 C fresh or thawed frozen raspberries
One 750-ml bottle Italian sparkling wine, like Prosecco or Spumante, chilled
1. Puree the peaches in a blender. you should have 1/2 cup of peach puree. Pour into a small bowl. Rinse out blender.
2. Puree the raspberries in the blender. Strain the raspberries through a wire sieve to remove the seeds. You should have at least 2 TBSP of raspberry puree. pour into a small bowl. Chill.
3. For each serving, spoon a heaping tablespoon of each pure into the bottom of a champagne flute. Top with about 1 TSP of raspberry puree. Slowly fill the glass with the sparkling wine. To keep the foaming at a minimum, fill the glass halfway, let the fizzing subside, then finish with a second pour. Serve immediately.
Bellissimo!

Sometimes there's nothing better than sitting with a friend over a steaming cup of coffee and having a good talk. Well, if you're going to the trouble of waking up early, fixing your hair and meeting your friend at a coffee shop ... why not have them over and serve homemade Biscotti? To me, nothing says I love you more than food. I can't wait to invite someone over to taste the double chocolate Biscotti I just made. Picky Pants has started to drink coffee, so I guess we'll give it a try tomorrow, but don't worry, I won't make him have girl talk with me!
Again, this recipe is Teresa's (From her book, Skinny Italian) (I know! I have an obsession!)
Double Chocolate Biscotti
3 large eggs, at room temperature
1 Cup granulated sugar
1 TSP vanilla extract
1/4 TSP almond extract
2 1/2 Cups All purpose flour
1/4 Cup unsweetened cocoa
3/4 TSP baking powder
1/8 TSP salt
1 C Unsweetened Chocolate Chips
1/4 Cup confectioners' sugar, for kneading.
1. Position rack in the center of the oven and preheat to 350. Line a large baking sheet with parchment paper.
2. Whip the eggs, granulated sugar, vanilla and almond extract in a large bowl with an electric mixer on high speed until thick and pale yellow, about 3 minutes.
In another bowl, stir the flour, baking powder, and salt together,. Stir into the egg mixture to make a stiff, sticky dough. Stir in the chocolates.
3. Sprinkle the confectioners' sugar over the work surface. Transfer the dough to the work surface, and knead gently until the dough is cohesive and loses its' stickiness. shape into a thick 8-inch long log and transfer to the baking sheet. Shape the dough on the sheet into a log about 12 inches long and 2 inches wide.
** So, this is where I felt like the recipe gets ... well, "sticky." This dough is very moist and sticky! Next time I make it, I'll remember to pat the dough with confectioner's sugar quickly and transfer to pan. The longer you have it in your hands, the stickier it gets. Make the log and move on, it's Biscotti, it will be pretty no matter what ... and if you're sharing it with a friend, they won't care ;)
4. Bake until the dough is lightly browned and cracked, and feels set when pressed on the top, about 30 minutes. Let cool on the baking sheet for 30 minutes.
5. Reduce the oven temperature to 325. Carefully transfer the log to a chopping board. Using a serrated knife, cut the log on a diagonal into 1/2 inch thick slices. Arrange the slices, flat sides down, on the baking sheet. Bake until the surfaces begin to brown, about 10 minutes. Flip the Biscotti over, and bake for another 10 minutes. The Biscotti will become crisper when cooled. Transfer to a wire cooling rack and cool completely.
Dunk in milk, cocoa and coffee and most importantly: Mangia! Mangia!

Turkey Burgers
I've had an interest in Turkey Burgers since our trip to Vegas a few weeks ago. Unfortunately, I'll always remember the day the Turkey Burger caught my eye ... it
happened after Picky Pants and I learned of the flooding in our basement, suddenly, drinking wine and going to dinner with the crew didn't seem as enticing as laying by ourselves in our hotel room overlooking The Strip. Yes, I know we sound like a barrel of fun. Normally we are, this was abnormal. Anyway, Picky Pants swore he was "too sick about the basement" to eat dinner that night. Me? Well, we know that answer! I picked up the phone and ordered two Turkey Burgers from room service.
Me + Food = Happy. And to my surprise, Picky Pants ate every bite of his burger!
So, yesterday I made some of my sister's best salsa recipe ever. It makes a ton, so I had a lot left over and knew I wouldn't be snacking on chips and dip this week. This, friends, is a great way to sneak in some veggies to those ... PICKY eaters. ;)
I mixed some salsa with the ground turkey, rolled into 6 patties and grilled on my cooktop. YUM! What kind of Turkey Burgers do you make? And, more importantly, what kind of creative things can you make out of what's in your refrigerator? I'm a big fan of "throwing things together" and today, it was a hit!
If you haven't had the opportunity to try the homemade salsa I make ... it's my sister's recipe. (Why doesn't she have a blog?!) It's awesome and very versatile, hello - turkey burgers! You can stick it in chili, tacos, Queso Dip, serve with tortillas and hide in burgers!
Turkey Burgers:
1 lb Ground Turkey
Lindsay's Salsa
Lindsay's Salsa
4 large tomatoes, diced
2 yellow Spanish onions, diced
2-3 cloves garlic, minced
1 jalapeno, minced
1 can black beans, drained
1 can corn, drained
Hand full Cilantro, chopped
Juice of 1 lime
Salt
Hot sauce
Chili Powder
Fresh is best with all these ingredients:fresh garlic, onion, jalapeno and tomato. However, if you get into a pinch, buy low sodium diced tomatoes and add the salt yourself. A can of Rotel will do as well.
Mangia! Mangia! XXXOOO!
Chicken with Angel Hair Pasta and Tomato Spinach Cream Sauce
Monday, May 24, 2010

This is a filling, healthy and romantic meal -- plus easy! Get someone to pick up the kids and have date night, Italian Style!
First, don't let the "Cream" in the name of this recipe scare you! It's not what you think (a la Alfredo from last week!) Also, don't let me fool you, this recipe is my sisters' delicious concoction. It. Is. So. Good! I used organic whole wheat spaghetti noodles. Always. My new cooking hero,Teresa Giudice from the New Jersey Housewives, says real Italian pasta is made with a hard wheat called durum that's coarsely ground to a flour called semolina. Italian pasta is slow-digesting and could be considered a whole grain! (From her book, Skinny Italian)
I looked at the "ingredient" on my package of pasta and it said: 100 percent organic durum wheat. Yay for me! Check yours, what does it say?
Another thing I learned from Teresa's book Skinny Italian is NOT to rinse your pasta after it's boiled. She says the starch on the noodles helps "grab" the sauce, instead of being slippery and letting it run off onto your plate, or worse ... your cute white pants for summer!! So, tonight, I did not rinse my pasta and I'll tell ya, it did make a difference. Teresa is the real deal. Grandma Errico and my Mom would agree ;)
Chicken with Angel Hair Pasta and Tomato Spinach Cream Sauce
Olive Oil
2 breasts of chicken
Salt, pepper
Chicken broth (1-2 Cups)
Juice of 1 lemon
3-4 cloves of garlic
Flour
Red Pepper Flakes
Medium Onion, diced
1 C Milk
Parsley
Chicken Broth
1 Can (16oz) diced tomatoes (Don't drain)
2 C Spinach
Parmesan Cheese
Angel Hair Pasta
Wondra
1. Heat Olive Oil in pan on medium/high heat. Cube chicken, season with salt and pepper, dredge in flour and cook chicken until done. Set aside.
2. Put diced onions in pan and add chicken broth, scraping bits off the bottom of the pan and simmer. Add enough chicken broth to submerge onions. Allow to cook 3-4 minutes at a boil. Add garlic, Parsley, Red Pepper and lemon juice.
3. Add milk to 2-3 TBSP Wondra in small cup and whisk. Add to chicken broth and onion stirring constantly for smooth texture.
4. Taste and adjust spices as needed. Add tomatoes to cream sauce. Stir to heat. Add chicken. Grab a handful of spinach and tear in half, place in the pot. Toss with tongs to cover spinach with pasta and sauce. Place lid on pan long enough for spinach to wilt. It doesn't take long.

Sprinkle a little bit of cheese and enjoy!
A few things about this recipe that I will adapt for next time. Picky Pants likes spicy food, but doesn't love it. I apparently made it spicy tonight. I loved it, go figure. He also doesn't like tomatoes and picked every one out. So, next time I think I'll chop a zucchini and use the juice of the diced tomatoes and reserve the diced tomatoes for something else. It would be fun to see what else you come up with ... mushrooms, pine nuts ... I could probably think of other stuff to stick in there too. Let me know if you do something else.
If you're like me, you don't like to waste food. Well, this recipe only calls for one to two cups of chicken broth. So, you have quite a bit leftover. Remember you can stick it in a Tupperware and save it for the next night when you're boiling quinoa, rice, macaroni, or any vegetable you want steamed. It actually gives anything you're boiling or steaming a better flavor. And, that way, you're not wasting anything!
Picky Pants has a sweet tooth! One of his favorite healthy desserts is a whole, sliced banana and mini chocolate chips. Stick it in the freezer for 10 - 15 minutes. It's kind of like a frozen Popsicle with chocolate. Eat with a spoon and enjoy!
Let me know what you think about this one, I think the pics turned out great! Mangi! Mangi!

Avocado on the Go!
Saturday, May 22, 2010

To me, there's nothing better than an avocado. I had a commercial shoot for IGA in Jasper, Indiana last week Wednesday - Friday. It was fun but exhausting and I had no time to prepare healthy food for myself on the road. So, the first thing I did once arriving in Jasper is to check out the IGA. A sea of colorful produce greeted me and I went straight for the alligator textured green avocados. They looked great. (Pictures to come.) I picked up two avocados, a package of black berries and cheese. I have been trying to eat half an avocado a day. Whether or not I smash it with a fork and spread it on my sandwiches or chop it up in salads I have been trying to get half in. Sometimes, I slice one open and eat the green, buttery goodness with a spoon! In fact, that's what I had to do while in Jasper. For those of you who don't pick out avocados at the store, make sure you get one that's ripe! Place it in your hand and squeeze gently to see if it's soft, but not squishy. That means you need to eat it pretty soon. Do not even try to slice open a rock-hard avocado! Run the knife around the avocado, not through, and twist open. One side will have a huge pit and the other side won't. Take out the pit and run a spoon around the edges of the avocado to loosen it from the sides.
Besides being the "good" fat we should have in our diet, avocados are also filling and a great addition to salads, sandwiches, soups, dips and more! I wanted to share the nutritional information with you from The Amazing Avocado
Did you know eating avocados help your body absorb essential vitamins and minerals, make teeth and bones strong, enhance cardiovascular activity, support immune health and give elasticity to the skin?
Yumo! Look good, feel good, eat an avocado!
Today, I am going to lunch with a friend, I am bringing half an avocado to cut into my salad. I know it's strange, but the place she chose isn't famous for healthy salads... join me this summer as I try to eat half an avocado each day! Mangi!Mangi!
Fettuccine Alfredo in a pinch
Monday, May 17, 2010
 This post should be titled "Not Meant to Make Macaroons." The Macaroon has made a comeback. Yes, while some strive to be fashion forward, I try to be food forward. So, in case you haven't heard, the Macaroon is the new cupcake. I made some beautiful golden Macaroons with cherries nestled in the center and a drizzle of chocolate on top. However, I forgot to spray the parchment paper and now my Macaroons are stuck. I tried to save them, but couldn't salvage any of my Macaroons. Did I bite off the top part and were they good, absolutely! So there. I promised to tell you about my victories and my blunders. There's one. I was sad after ruining my Macaroons, so I just threw together some dinner with what I saw in the refrigerator: Heavy Whipping Cream, Butter, Parmesan Cheese, Zucchini,IGA Roasted Chicken, garlic and some spices. Oh yes babies, I made the most fattening dish of all and we enjoyed it thoroughly. Jillian Michaels workout tomorrow morning, here I come!
Fettuccine Alfredo in a pinch
serves 3-4 (depending on how much pasta you make)
What you need:
Pasta
1 small carton Heavy Whipping Cream
5 oz tub of Grated Parmesan
1/2 stick butter
1 tbsp minced garlic (from a jar)
salt
pepper
Dash Crushed Red Pepper
1. In a medium sauce pan, boil Pasta as directed on the box, once boiled, stick in a colander and run cold water over it to keep from sticking together. Put pasta back into the sauce pan.
2. In a small sauce pan, heat butter and garlic on medium or medium low until melted. Pour in heavy whipping cream and cheese. Stir constantly, turn heat down to simmer. Add salt, pepper and crushed red pepper.
3. Simmer for at least 10 minutes to let sauce thicken.
4. Pour over pasta and serve with fresh parsley.
* I chopped up one zucchini and took an IGA roasted chicken, shredded it and stuck it into the sauce pan
If you have leftovers, warm up Fettuccine Alfredo with a little milk in a saucepan on the stove.
 Mangi! Mangi!
Subscribe to:
Posts (Atom)
My IGA! Copyright © 2009 Designed by Ipietoon Blogger Template for Bie Blogger Template Vector by DaPino


